The No L Puzzle - a christmas story

Santa had asked his chief elf to make a new sign for his workshop. It had taken most of the year to make, each letter being carefully crafted by a skilled team of woodworking elves. They had made most of the letters, but they had just to make the T to finish SANTA. 

Unfortunately, one of the naughty elves snuck into Mrs Claus’ drinks cabinet and took a bottle of egg nog. As you may know, Elves are not really supposed to drink, and certainly not whilst woodworking! That is how Eric One Ear got his name, due to an unfortunate incident with a left-handed tenon saw. 

So instead of making the large letter T, that they were supposed to make, they kept chopping bits off, mostly in the shape of the letter L, until they were left with a small letter T. 

The chief elf was furious and shouted at the elves that had got drunk in the workshop. This didn’t really help as they were all hungover, and so couldn’t think straight. 

Just at that moment Mrs Claus came in to ask if anyone had seen her egg nog, and seeing the elves, surrounded by the 5 L pieces and the small T, she laughed and said, “ Ho, Ho, Ho, can we not just put the pieces back together to make the large T you were supposed to make?”

Now the Elves tried and tried, but they did not seem to be able to make the T. Until the sign is finished Santa and his elves cannot begin work in the new “SANTA WORKSHOP”, after all, a “SANA WORKSHOP” is just not the same.

Can you make the capital T that is needed using the 6 pieces the elves have below?

The No L Puzzle.png
Posted on December 19, 2019 .

Four steel engineer made geometric puzzles

A story of how some hand made puzzles were carefully ‘restored’ with the help of some friends.

Image from auction

Image from auction

A recent auction had a very interesting lot, it was for four puzzles which were listed as being Steel Engineer Made. How could I resist, especially as one was a kumiki cube. All four were well known puzzles, and I seemed to remember they were all in one of Edwin M. Wyatt’s books. When I checked I found that they were indeed listed in “Puzzles in Wood”.

They were;

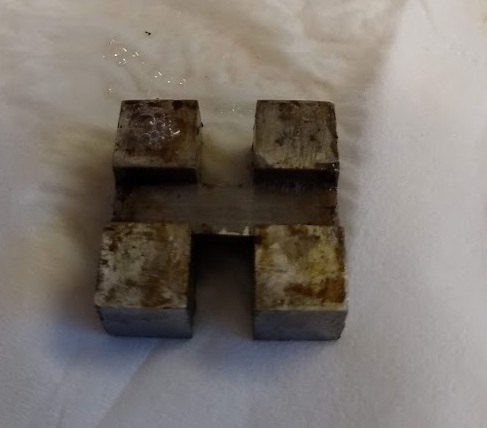
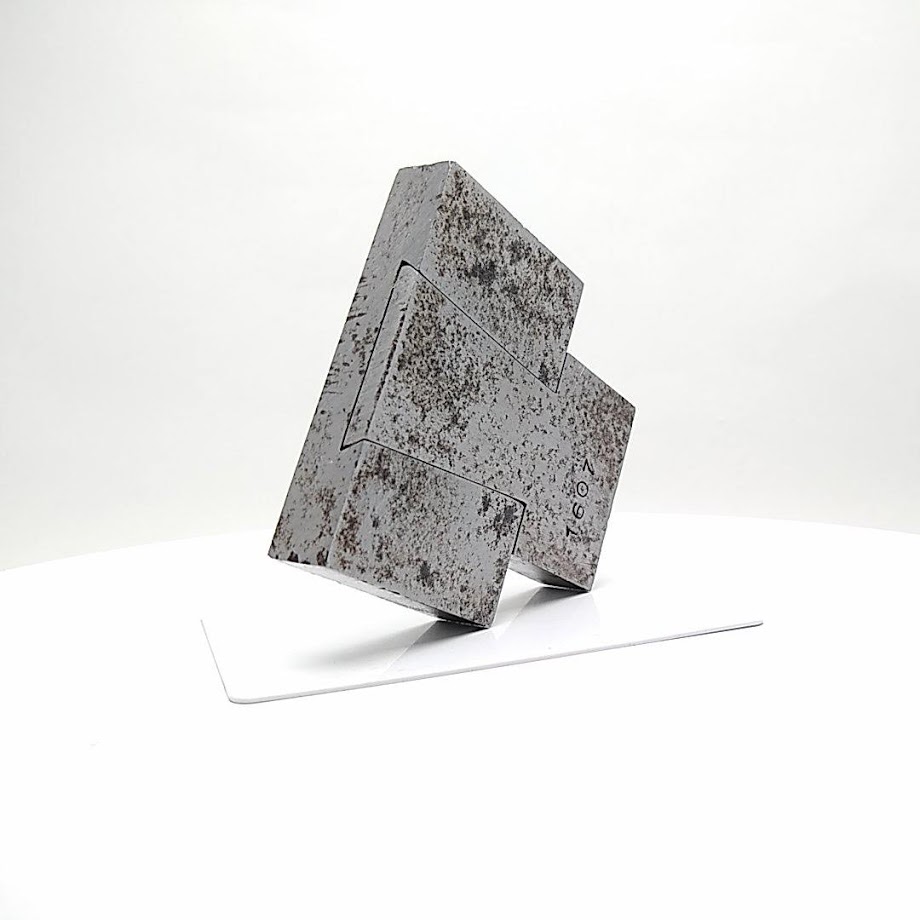
  1. The Double (?) Dovetail
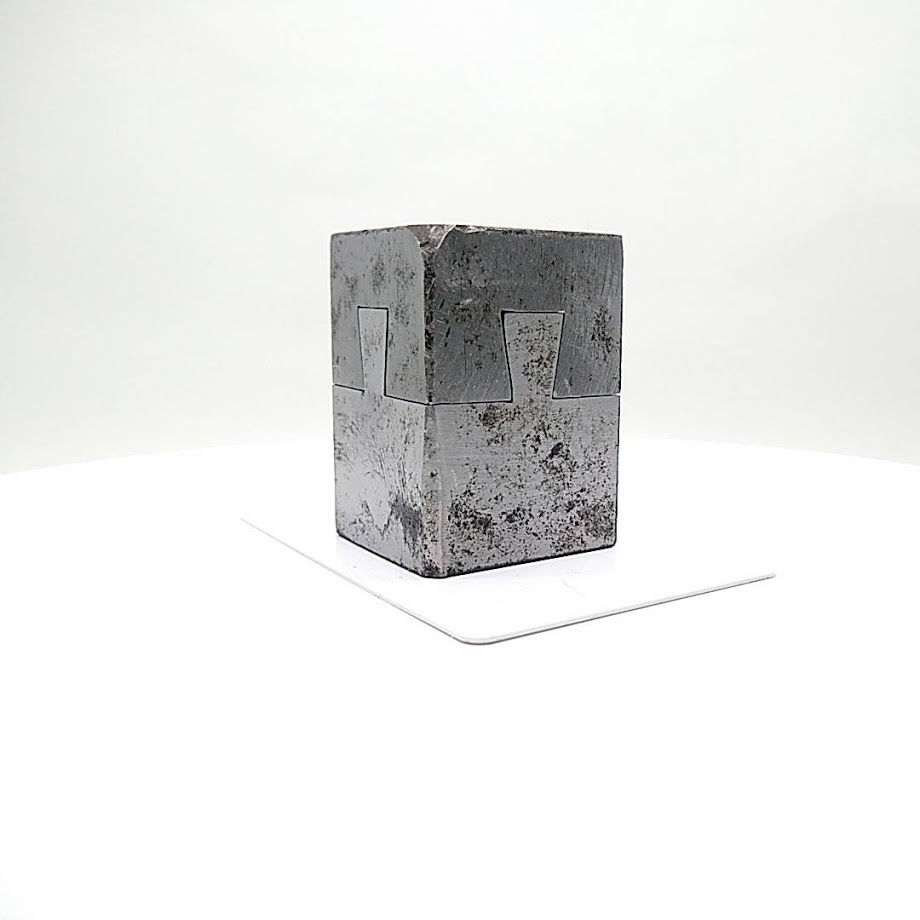
  2. Built Up Cube

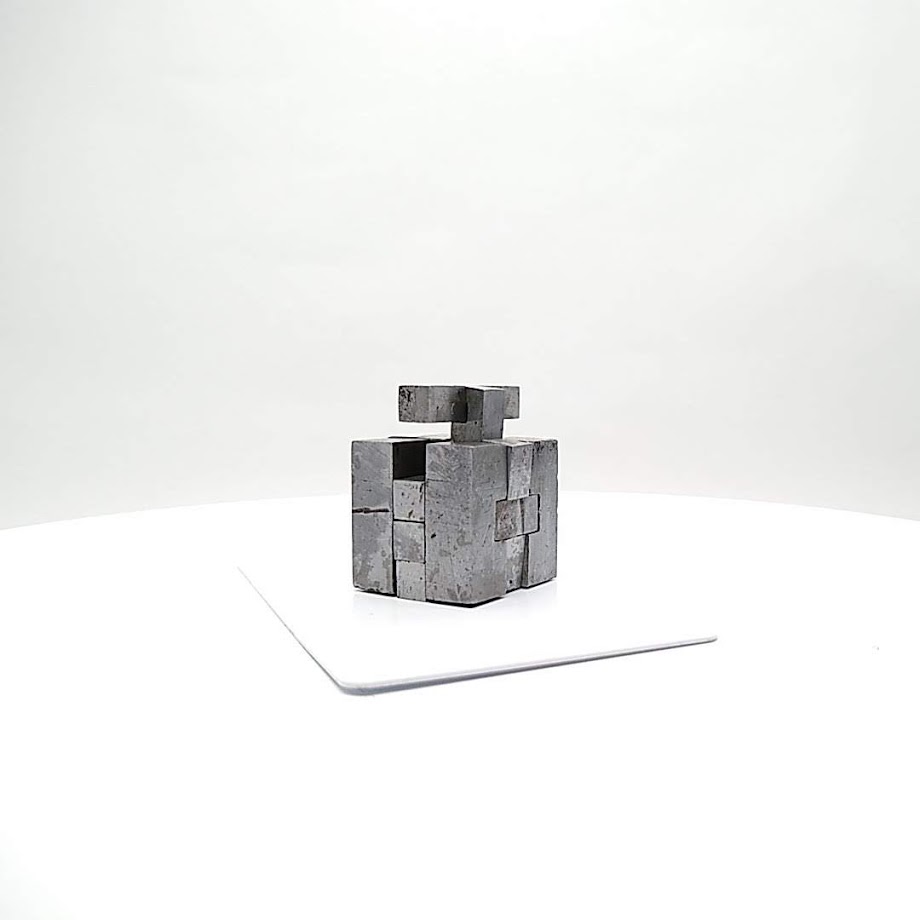
  3. The “Impossible” Dovetail joint
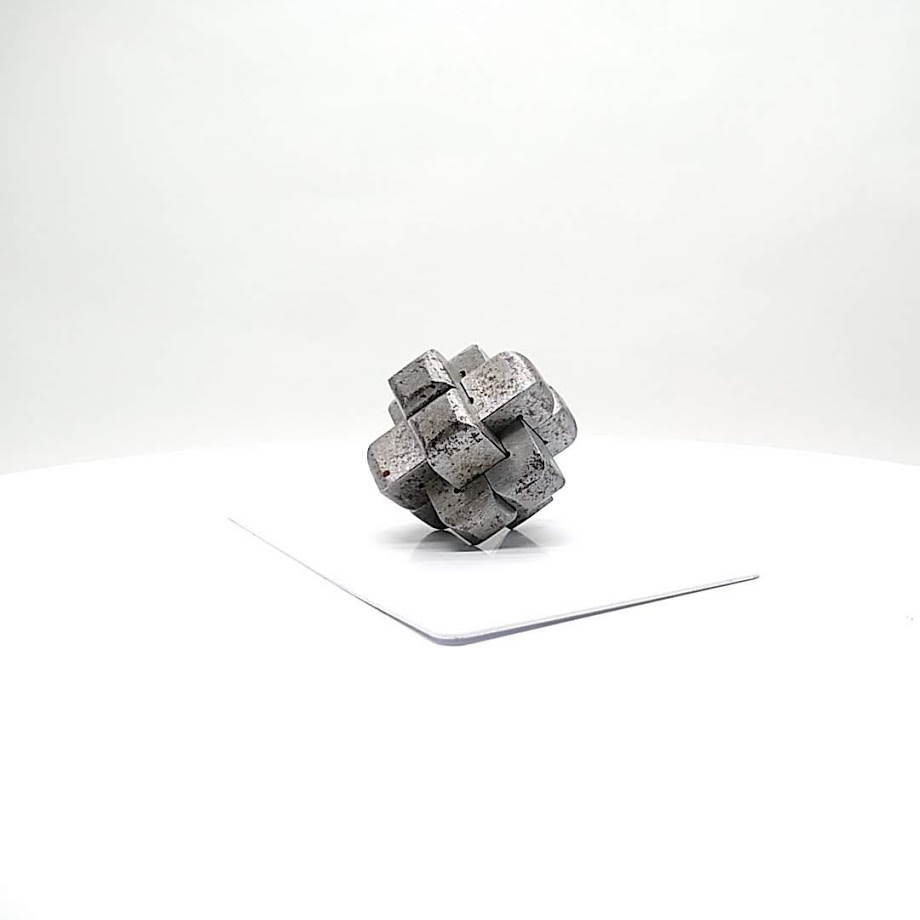
  4. Six Piece Burr

So I decided to put a bid in, the estimate looked very attractive, so I registered and place my bid., Then I set a reminder for the day of the auction to watch it online. Everything was in place!

So the day of the auction and I had some meetings which went well, so I had a bit of free time. Logging on to the site I could see the auctioneer and watch as he sold the items before the puzzles. When the tiem for the puzzles came - someone else was bidding! A brief bidding war ensued, but I was victorious and very pleased with the win.

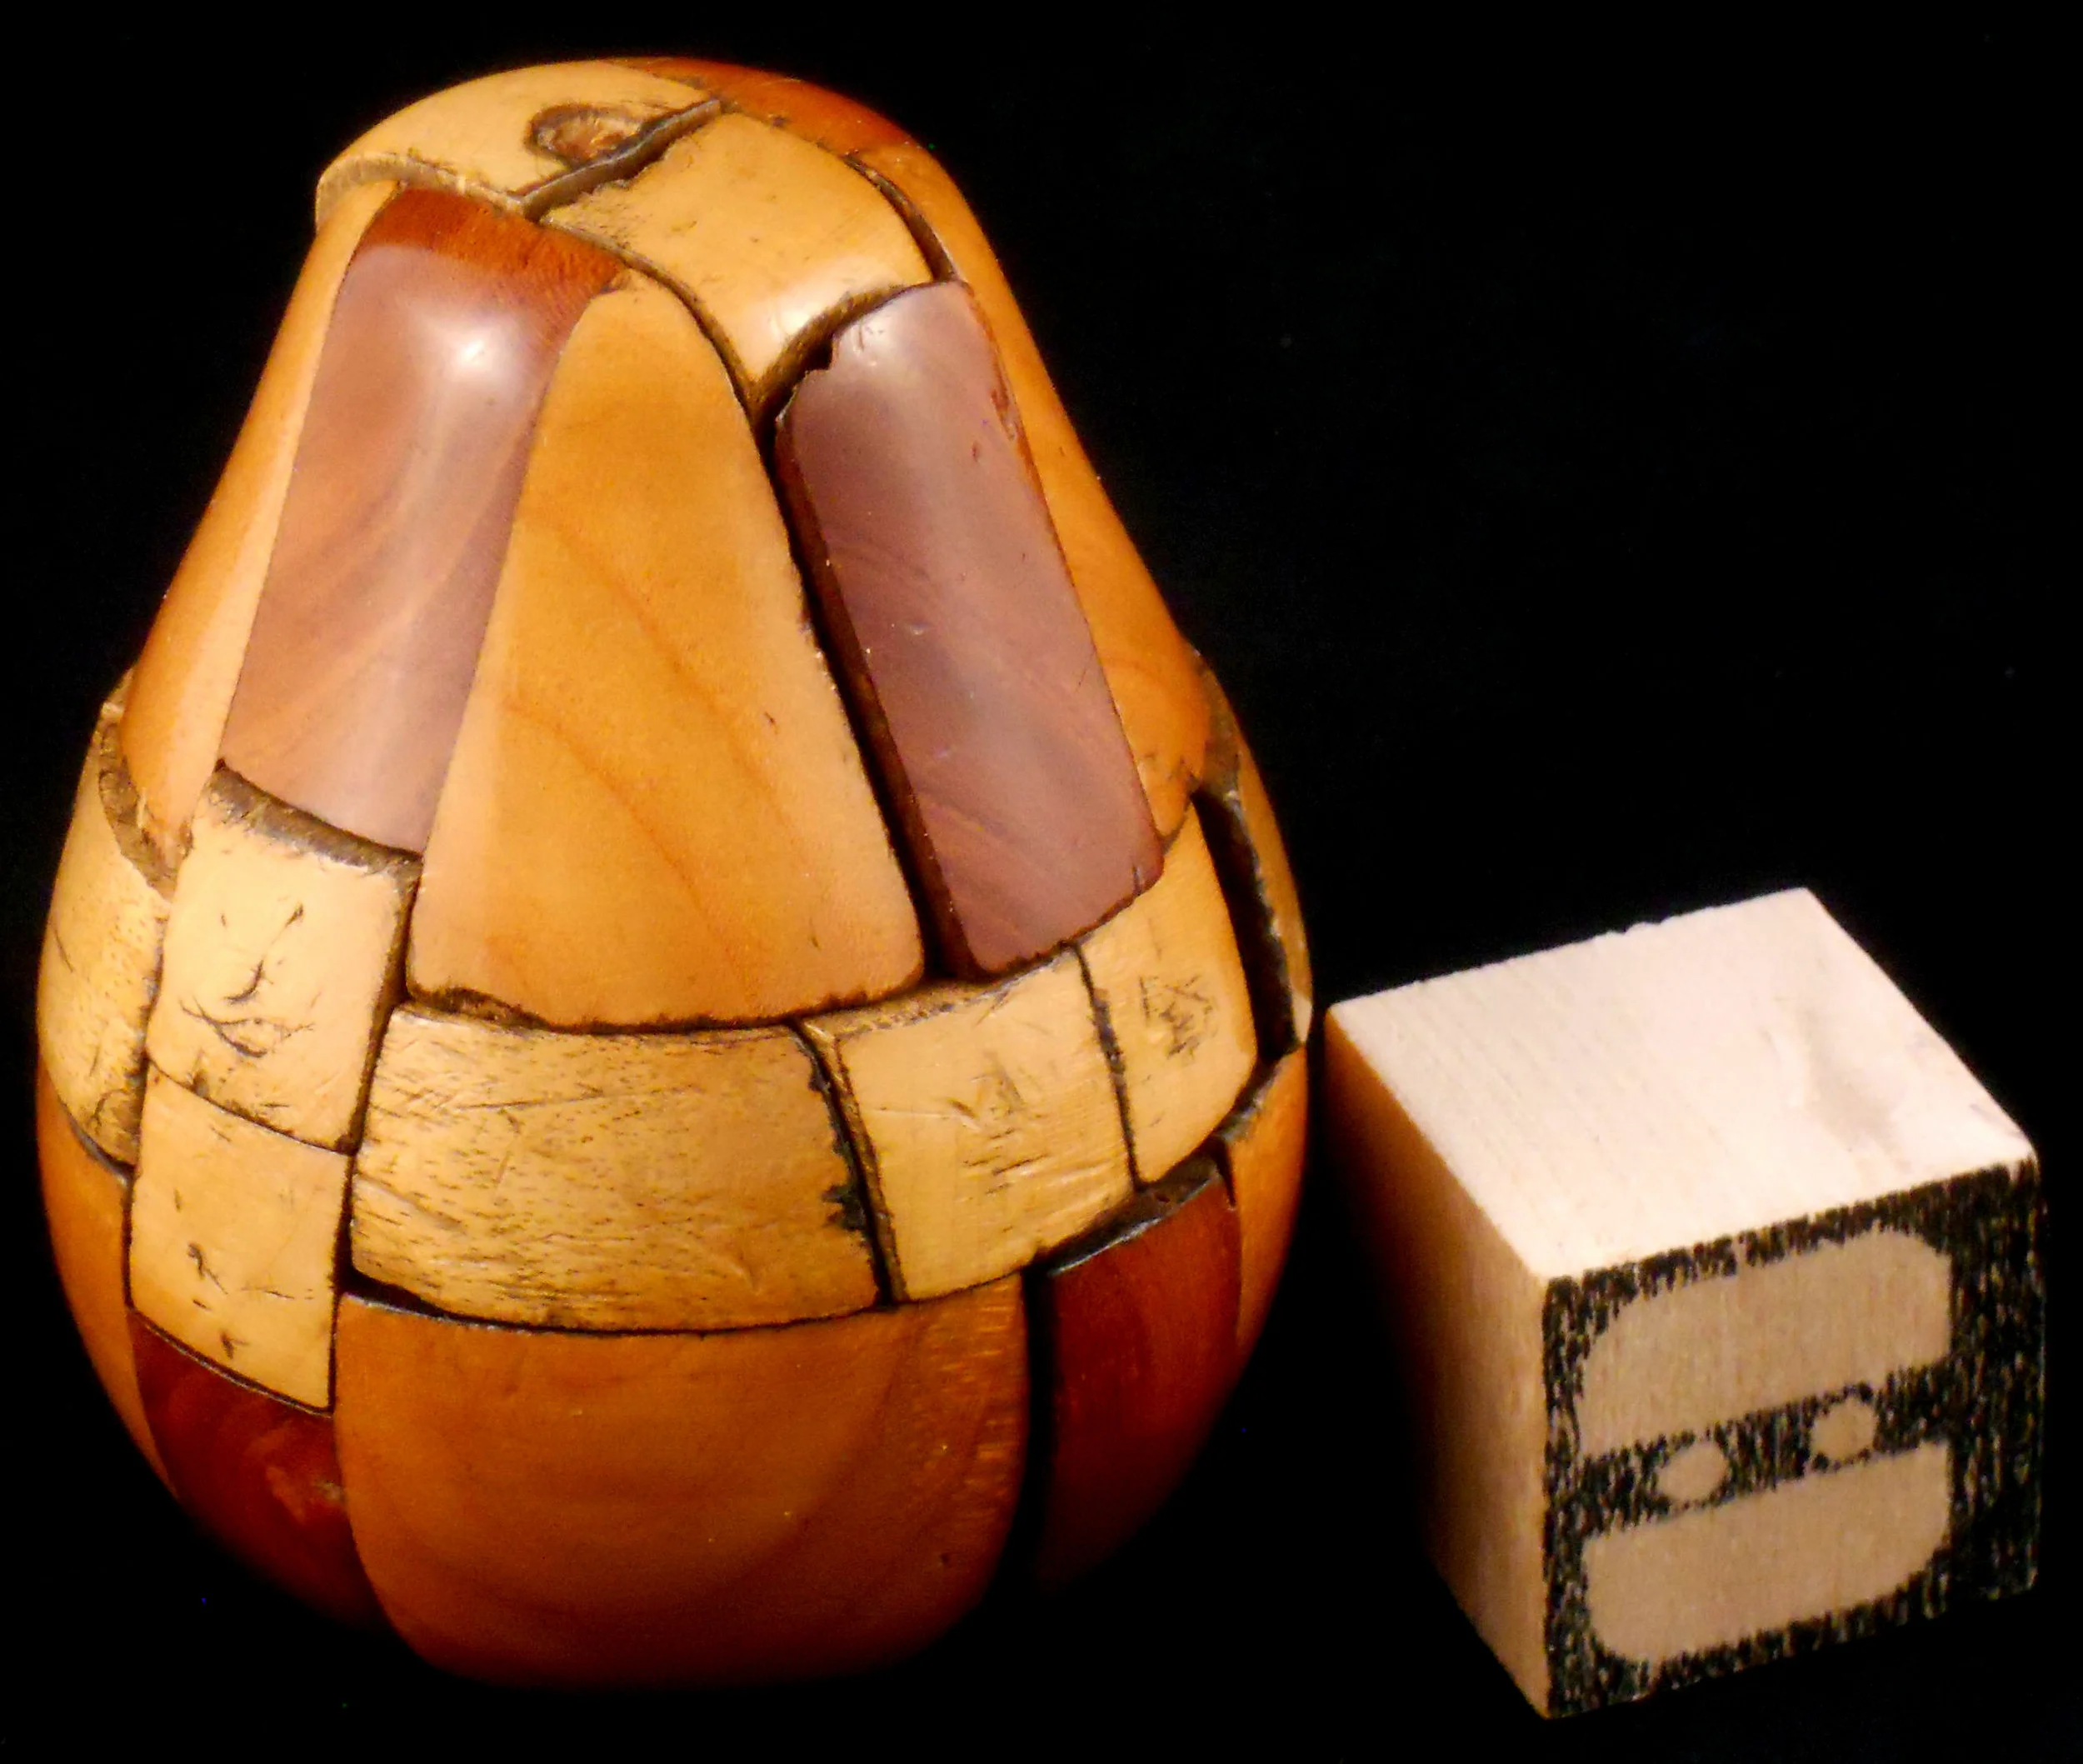
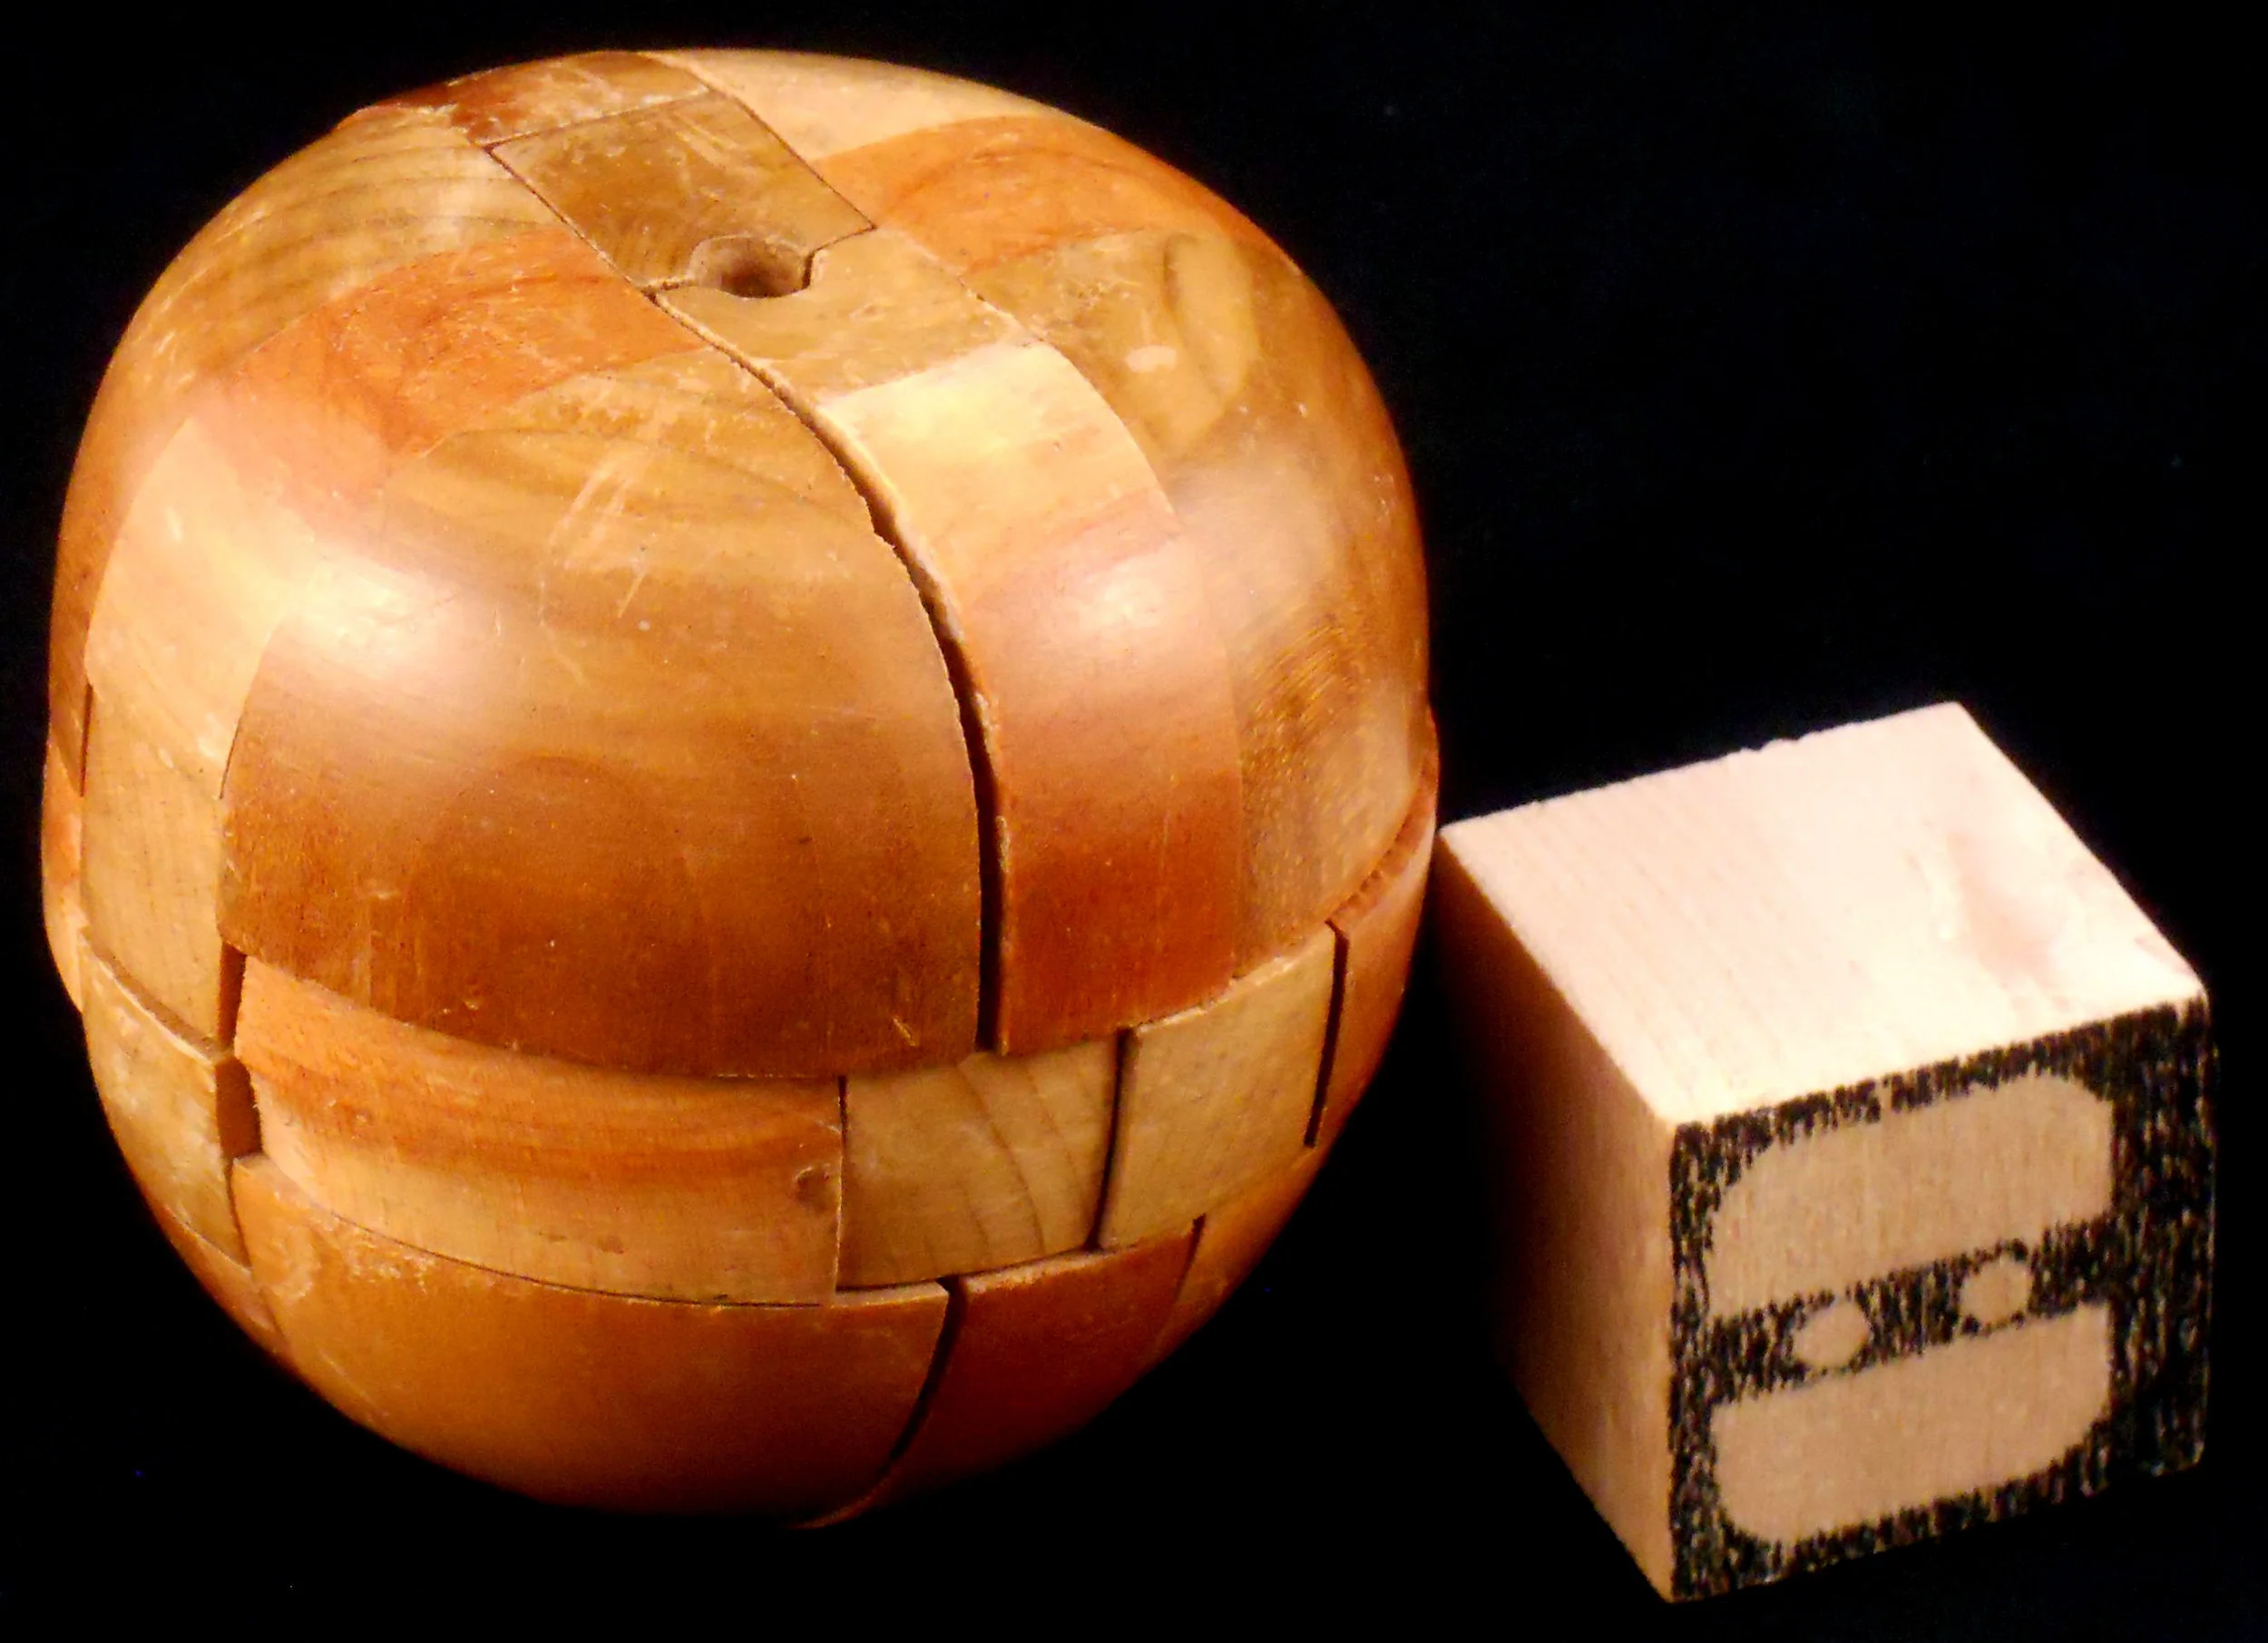
This was a week before the next MPP, so I confirmed my details and arranged for shipping, asking that they arrive before the next weekend. All went to plan and they arrived. I was a little surprised (as no dimensions had been supplied), at the size of the puzzles. The cube is approx 2.4cm (1 inch) along a side. But it is solid steel so the cube weighs in at 120gm (4.2 oz)

I only had chance to play with them briefly before I had to pack them to take to MPP, but I could not get any movement on any of them. I assumed that corrosion had set in and locked them up, so had mentally prepared myself for some chemical shenanigans to loosen them up. I should not have worried - the brains that go to MPP were soon on the task!

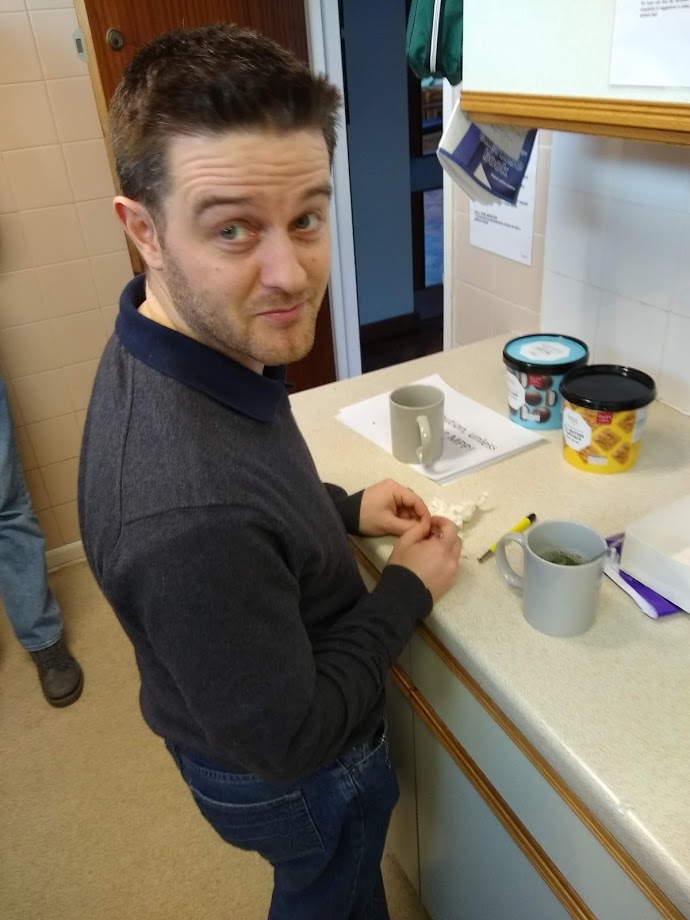
So I arrived with the 4 puzzles, wrapped in tissue paper to protect them (I know they are steel but that is how they arrived). Telling the story of how I got them, I handed them out for people to play with.

Speculation on who had made them, as the method shown on some of the pieces were identified as a Tool Makers technique, and if someone had cleaned them up before the sale. There is some pitting of the surface and lots of gunk in the six piece burr, but most of the surfaces appear to have been cleaned with something fairly abrasive.

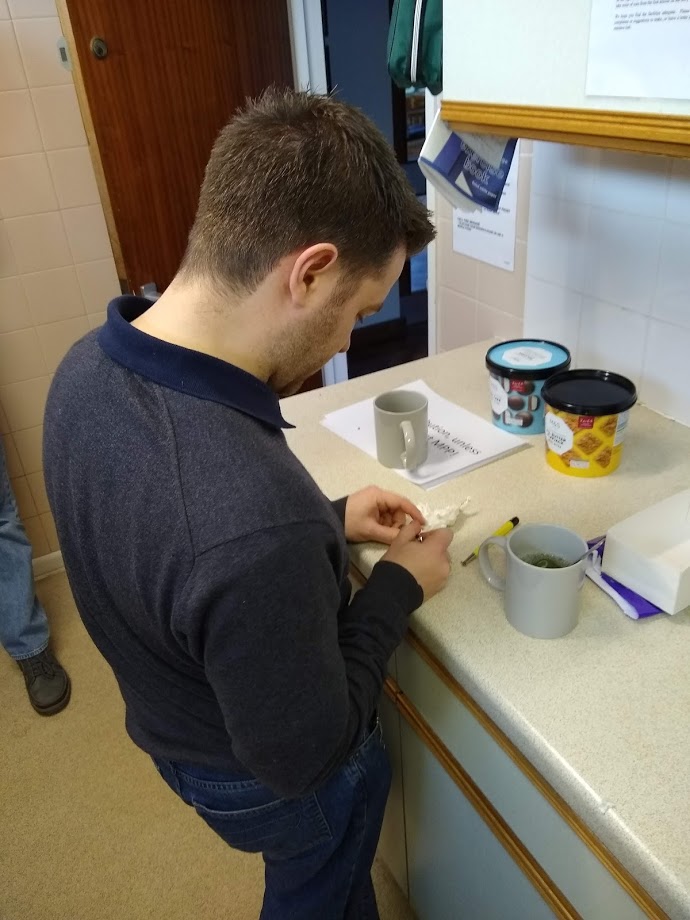
Whilst we are examining them, the muscles of Allard are exercised on the Double Dovetail (that’s the T shaped one) and some movement is found. This encourages other to try and Chris soon has quite a lot of movement on the Impossible Dovetail. Sliding it back and forth soon exposes some yellowy substance, a little bit powdery but which can be scraped off with a fingernail. This is coming from inside the joint.

We decide this must be dried grease, which is basically gluing the pieces together. Lots of suggestions on how I can clean this out, with de-greaser, maybe some heat and a couple of other suggestions.

Unfortunately the hall doesn’t have a workshop, so we continue discussing how to clean them as we head to make a cup of coffee.

Now it must have been the spirit of McGyver or something, but seeing a water boiler and a bottle of washing up liquid we quickly began to think we may have a solution on hand to our problem.

I was a little nervous, as I had heard that water and steel do not always go well together. But I thought it was worth a try - and I could always clean any rust that formed later.

So a mug was taken, the Double Dovetail put in it, and boiling water added. Now how long should we wait? 20 seconds long enough? We were in uncharted territory, so the mug was tipped into the sink, so we didn’t scald ourselves (ok we tried to get it out with a teaspoon but that was too much of a dexterity puzzle for us). Picking up the puzzle and gently pulling it apart, and hey presto it worked. Then I remembered a lesson from school - Metal is a very good conductor of heat, and as this is a fairly solid piece of steel, it retains a certain amount of heat for some time. That is when the puzzle was dropped (not for the last time) with an exclamation that would get this blog blocked from most web filtering.

But the pieces were apart.

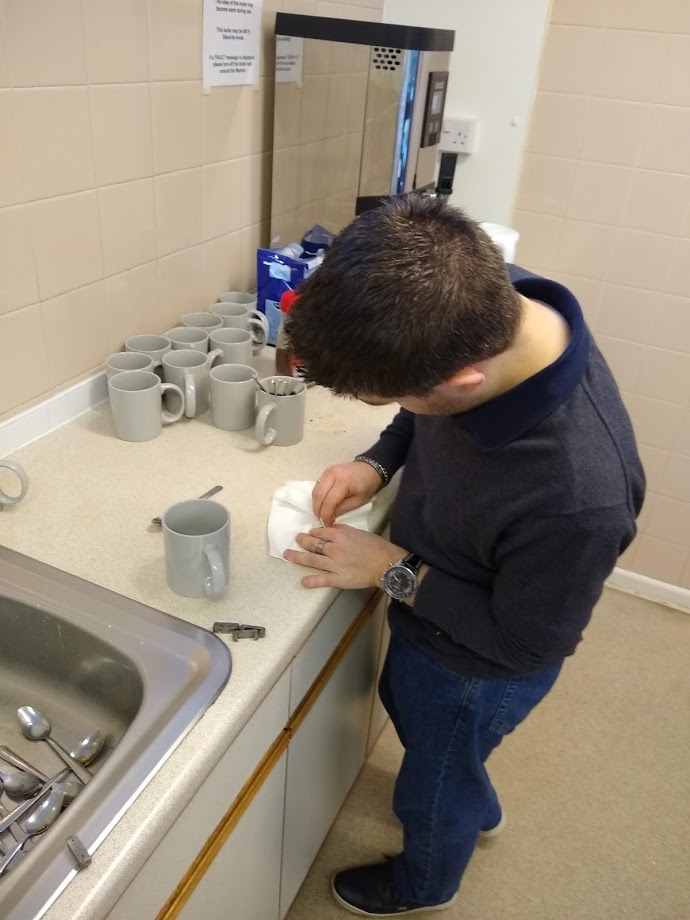
Obviously the pieces needed to be picked up with something, so kitchen towels were used to insulate us from the heat (to a lesser degree than we first thought), and accompanied by various exclamations, the sound of steel hitting the worktop, the pieces were gradually cleaned.

Now at this point I must give full credit to Chris - he undertook this task with some gusto, and seemed to have come prepared for this exact task, pulling out a ‘brass pen’ - another learning experience as I didn’t know they existed, to clean the gunk from inside the puzzle.

Now the “Impossible” Dovetail came apart quite easily, as did the six piece burr, but as puzzles they are fairly easy to spot which how they work. These were cleaned up - using the heat, swear, drop, clean method - and worked well. The craftsmanship was such that the edges of the metals were sharp and the movement smooth.

But the cube was proving very difficult. The process was;

  1. Place in boiling water.

  2. Remove and try not to burn yourself

  3. Push on the possible key pieces, whilst juggling it to stop it scalding your hands

  4. Find it had cooled too much anyway, so wasn’t going to come apart.

  5. return to step 1.

Cube piece after being taken apart.

Cube piece after being taken apart.

This went on for a while, and I was beginning to think a soak in WD40 was going to be needed, but Chris encouraged me by saying that it would be a bit of a failure if we didn’t get all 4 puzzles apart and cleaned up. Eventually using a metal rod resting on the worktop, and pushing the cube down, the key piece was found and the puzzle was taken apart. You can see below the amount of dirt inside some of the pieces which were holding the puzzle together.

partly cleaned

partly cleaned

So we had success, 4 puzzles that worked and just needed a final bit of cleaning up when I got home. The dovetails work perhaps a little too well, as there is little/ no friction to keep them together.

The cube looks like it has been hand cut, which differs from the others, which all seem to have some machining on them.

Some picture below of how they look, now they have been cleaned and coated in a light coating of Renaissance wax.

So I now have 4 steel puzzles in my collection. I have asked if the auction house could pass my details to the seller, as I would love to know more about the person who made them. But for now, it is the memories of another great MPP, with perhaps a little more swearing than usual, that these puzzles bring.

Posted on February 18, 2019 .

How do I design puzzles?

I have been asked a couple of times how I come up with designs. It is a difficult question to answer, sometimes it can be inspiration from another puzzle, sometimes it is thinking of a specific challenge and then designing to achieve it, and occasionally it is just playing around with burrtools to see what come out.

I am not the most prolific designer, and some of the ideas I have in my notebook are so complex that I doubt they will ever see the light of day. But I thought I would share a few of my designs and a bit of background to them.


Minotaur Burr

I had been thinking about how to arrange my collection, and some of the puzzle classifications did not seem to fit all of the puzzles in my collection. Was it an assembly, disassembly, route finding or sequential movement. So I started thinking about how many categories a puzzle could possibly fall into? I have since seen a rubic cube puzzle box, now is that a sequential movement, or a secret opening, or a take apart puzzle !?

Photo courtesy of Mr Puzzle - www.mrpuzzle.com.au

Photo courtesy of Mr Puzzle - www.mrpuzzle.com.au

So I started thinking about combining puzzles types into a single puzzle. And a route finding burr puzzle seemed to be a good place to start. Inspired by some of Oskar’s designs (in particular Oskar’s cube), and also Culax by Markus Goetz, What is you could take the maze and make it part of the piece you are trying to remove ? I got out burr tools and started playing around with different mazes on each piece.

Originally I was trying for 3 interlinked mazes, but that proved a bit too much, so I ended up with 2 mazes and a rod. Happy with the design I sent it to a couple of craftsmen I know, and Brian Young agreed to make it as a limited edition. I was very happy with the design and the way Brian made it combining metal, wood and acrylic works very well. So from a thought about how to categorize puzzles came a route finding, take apart puzzle.


3EE puzzle

I had decided to enter the IPP puzzle exchange, and needed a puzzle. So I went to my software tool of choice - burrtools. However, part way through designing a 3 piece burr (yes I like 3 piece burrs !) , I suddenly realized that it would be very easy for anyone to solve the puzzle, by simply entering it into burrtools, and what is the point of that.

So I got out some live cubes I had laying around from a previous project, and having decided that a rotation (Sorry John) was the best way to prevent burr tools from solving the puzzle, I went to work. It proved to be a more challenging and more interesting project to use the cubes and play with the puzzle, adding a cube here and there to a simple base shape. Every once in a while I would enter the pieces into burrtools to see if it could find a solution. Once I had found a shape I liked I sent it to be lazer cut by a puzzle maker and designer I know.

This is where I learnt a very valuable lesson for anyone designing puzzles. Get someone else to try it!! I thought it was a fairly simple puzzle, with a moderate level of challenge. It proved to be much more difficult fhan I thought, and so it became 3EE made by Eric Fuller and used as my exchange puzzle.


Imp-Possible Nail

This one was inspired by Saul Bobroff’s Tooth and Nail. But I wanted to see if I could get it into a ring, rather than the shape that Saul used. This uses a different ‘trick’.

So sometimes the inspiration can come from another puzzler, and as long as it does not copy their idea or at least references it if appropriate, then I don’t think this should cause any problems.


So all three of these puzzles had different inspiration, but each one has it’s basic root in taking the challenge I wanted to achieve and designing to fit that idea. Anyway, off to revisit some of the designs I have made to see if they can be brought to life.

Cheers

Frank

Posted on January 26, 2019 .

Old design - Boundary Burr

Boundary burr.jpg

I was going through some old files and found this puzzle from Feb 2014. It appears to be one that I have designed (lots of variations on the pieces in the original file) - and I do remember it was an attempt to continue the concept of a burr puzzle that looked like one thing, but was in fact another.

It is a 4 piece puzzle, but is designed to look like a 6 piece board burr. There may be some rotations, as it is not clear from the burr tools file if these are possible.

Why did I call it Boundary burr? Well it is a bit of a cricket reference. A Boundary can be 4 runs or 6 runs, depending on if the ball bounces before crossing the boundary.

As always, happy for anyone to make this for themselves, or if they make a larger batch (up to around 50) then just send me one as my ‘commission’ :)

A level 14 (8.3.3) burr, which should provide a nice challenge for the puzzler, and depending on the materials and construction, could be made to look more like a 6 piece burr than a 4 piece ;)

The burr tools file is available on the ‘My Designs’ page.


Posted on January 3, 2019 .

An Elephant made from fish?

I recently found on the interweb an article about an artist in Korea who had designed a new version of the classic Kumiki elephant. This one could be produced from a single thickness of material, so making manufacture much easier.

See One Eyed Fish for more from the artist.

IMG_20171222_131139328.jpg

Obviously I was very interested in the puzzle and wanted to see if I could get hold of one. I wrote to the artist via their website and they very quickly responded. They did have the puzzle for sale, but only in a 'foam' version (kind of similar to the happy cubes). I decided to order one and a deal was struck. 

About 2 weeks after first finding the site I had one of the puzzles in my hand, very nicely packaged in a box, with an instruction book. 

IMG_20171222_125333671.jpg

The story is that a group of one eyed fish want to be an elephant, so they get together and make one. On the right you can see the pieces are cut out of sheet in what looks like a whale shape. Each individual piece looks like a stylized fish, so this all fits with the story in the book.

IMG_20171222_125852329.jpg

Having put together a few kumiki elephants before, I decided to simply take the pieces and put them together - however, this puzzle is slightly different, and it took a minute or two to work out how the pieces fit together.

The final puzzle is on the left - with a standard size rubik cube for scale. As the pieces are made of the foam, the friction helps keep the puzzle together, particularly the ears which are very different to a standard wooden elephant. 

The artist has mentioned that they may be making the puzzle in other materials later, and I am keen to see how they get on. I would particularly like the small plastic ones, or even a much larger wooden one. 

Once made I decided to introduce her (she is pink!) to the rest of the herd :)

IMG_20171222_130452337.jpg
Posted on February 9, 2018 .

An exercise in Python

Do you like optical illusions, or images where one things appears to be another? 

Well I have always liked them, simple images that look like a rabbit or a duck depending which way you look at it. Always fascinated me how the brain can be tricked into seeing things that are not there, or seeing things that appear to be something else. 

Two santas looking at each other, or a single santa?

Two santas looking at each other, or a single santa?

There is an annual competition for the best optical illusion of the year - see OPTICAL ILLUSION OF THE YEAR and there are some amazing things there.

I have played around with some previously based on other illusions, like the santa image on the right. This is based on the candlestick illusion, and someone had done a version with a single face behind it that gave the ambiguous effect. This was my attempt at a version. 

Above you can see a small carving of what looks like a harp from one direction and a treble cleff from another. This was originally cut from a block, with the shape running all the way through. It was fairly simple to then remove as much of the wood as I dared to give the object above.

Other illusions that have always interested me are those using text, whether it be wordles where a shape is filled with words in different fonts and sizes or Ambigrams where the word is different from different viewpoints,.. There are a number of websites that you can use to generate these and looking on sites like etsy you can find artists who will make them for you. 

However, I had not seen one particular type of illusion being generated. This is a section of text with an image 'hidden' in it. Either by using different colours, bold, italic or some other effect. So I decided to have a go at creating my own using Python. As it turns out it was very simple to do. There are a number of libraries for processing images (CV2) and then using the array functions in numpy it proved a simple programming task to achieve t.he desired effect.

So here is how I did it;

1. Import the image using the cv2 library which creates an array of pixels.

2. create a similar array using text repeating to fill an array the same size as the image

3. apply an effect based on the pixels to the text, either the colour, or if monochrome, make the letter bold in each 'texel' (I just made that up - apologies!). I did this using html as it is easy to apply different effects using css or simply adding the format.

However, I did find that the ratio of pixel to 'texel' was a bit off, and had to stretch the text by 50% horizontally. Below you can see the original image and the text result. The image is best reduced to a small number of pixels, otherwise the text is too big to display easily. 100 pixels will fit onto an A4 sheet when the text is size 4 font.

Python makes this very simple to do, however, the CV2 library does give colours in BGR format, which is RGB reversed for some reason. The first time the program ran, the colours were very odd, a bit Andy Warhol-ish. Something to explore later I think.

suggestions for other effects welcome - I am working on making the program a bit more interactive, rather than editing the script every time.

Posted on September 30, 2017 .

A travel chest Kumiki puzzle

This puzzle came to me from ebay via a friend in the US. The seller took it apart to ship, but unfortunately they forgot to put one piece in. Then one of the pieces got mixed up with the packaging. So I thought that I was going to get 12 pieces instead of the 14 it should be. Thankfully the seller shipped the missing part and the last piece was discovered, making me a happy chap again.

It is one of the kumiki puzzles that can be used as a money box, the slot can just be seen under the roof of the box. 

Looking up on the internet I think this is called a "Norimono" in Japan - does anyone know for sure? I can see the characters for Kumiki on the label, but the rest is lost on me. 

Posted on January 15, 2017 .

3 Piece burr cube

This design came about because I was trying to make something that looked like a Kumiki cube, but that had a 3 piece burr in the middle. I took the Castel, designed by Yavuz Demirhan, and used that as the base for the puzzle. I removed 2 cubies from his design to allow the pieces to work. This was the final puzzle after playing around with a number of others, and this was a significant increase in the number of moves to solve. Interestingly the 3 piece burr is still a single solution. 

I am particularly pleased that the 4 double cube pieces are identical. 

Eric Fuller made a similar looking puzzle designed by William Hu Called Band Cube, and I am sure there are other similar designs. 


Posted on November 21, 2015 .

Kumiki - when is it different?

So when is a kumiki puzzle different - that is a question I have been pondering recently. I was first made aware of potential differences in identical looking puzzles by Martin Watson. He showed that the barrel can have the first move (which is usually 2 pieces) either horizontally, vertically, or from the top. This is basically a rotation of the first move.

So I started looking to see if any of the puzzles that looked the same were in fact different in construction. 


Apart from the the first move being along a different axis there are a number of differences that can be found in Kumiki puzzles. 

Firstly there is a completely different key piece or pieces

So these two pagoda puzzles look very similar, there are some cosmetic differences to the top of the tower, and slight differences in the shaping of the roof pieces. However, they have very different first moves.


The one on the left a solid key piece that simply slides out.


Whilst the one on the right has a twist key which releases the rest of the puzzle


So obviously both puzzles need to be in the collection.


This kind of difference can be seen on very common puzzles too, for instance the cube puzzle is one of the basic puzzles, and the standard has 2 pieces that slide out together. However, there is a version that only has a single key piece. 

The same with the planet / Jupiter / Flying saucer puzzle. 


The interesting thing is when there are very different moves, and a great example of this is the Trolley. Sometimes labeled as San Francisco, or even "Desire". There are 3 different first moves that I am aware of, a solid key piece that slides out of the middle of the trolley - a bit like the common pig puzzle, 2 pieces that slide out on the underside of the puzzle, and a single piece that slides out of the top.

See on the image below for the each example.

So you can see that next time you see a puzzle and think " I have one of those ", you may want to look a little more carefully.


Posted on September 7, 2015 .

Kumiki Fruit

Added more photographs of my collection, this time a healthy option with fruit puzzles. Includes a nice set of 4 puzzles in the box, which are painted and have additional paper/wire leaves.

Mostly they have 2 key pieces that are removed together and are similar to the standard cube/sphere puzzles. 

Posted on August 27, 2015 .

Photography of collection

Started photographing my Kumiki collection. This is going to take a while!!!

I recently purchased a collection of figural puzzles, with mostly wooden interlocking puzzles, but it does include examples of plastic puzzles too. I have been sorting my collection into related groups, e.g. space, guns, fruit, animals, buildings etc. Once I have gone through the collection I will have a number of duplicate puzzles, some of which are common, but a number of them are less so.

Once I have photographed all the puzzles, I then plan to scan the solution sheets in and link them to to relevant puzzle. This is a bit of a challenge, as most of the solutions are not stored with the puzzles - and although some puzzles look the same, they have different structures, so I need to scan the solution, find each puzzle that looks like it might be the same and then test the solution on it. My how those winter nights are going to fly by !

Anyway, hope you enjoy browsing the galleries I am uploading, they will increase as I complete each section. Let me know what you think, and any suggestions are welcome.

Posted on August 20, 2015 .

My first Kumiki design - Panda

I have wanted to design a Kumiki for a while, but just needed some inspiration. I decided that designing one for the IPP puzzle exchange would be a good incentive, and also as a present for my stepson. As he likes Pandas it was an easy choice of what shape to make. I do have a panda in my collection, but it has a basic square body, and just the head indicates what it is.

I also added the constraint that it should be black and white, but that the pieces should not be coloured, but use the natural material colours to decorate it. The first design needed a little tweeking, and with the help of Steve Nichols, one was 3d printed. Some light sanding of the pieces (need to adjust the tollerances of the data file) and the puzzle went together. 

I am really pleased with the way it has worked out, and although it is a simple puzzle is does look good. 

Next I want to add a bit more complexity to the puzzle, so that it is more challenging. Watch this space......

Posted on July 14, 2015 .

Kumiki Bear

This was part of a box of puzzles I bought recently. There were 3 fairly rare puzzles in the box, including an Origami Crane Kumiki puzzle. This one is slightly damaged and appears to have been glued at some stage. Always makes it more difficult to take part.


Posted on May 19, 2015 .

Journet Elusive picture puzzle

Illusive Picture

Managed to find another of the Illusive picture range - still trying to find out how many there are. Spent half an hour solving the puzzle, they do become more difficult when the cardboard backing warps slightly. 

Posted on May 13, 2015 .

Finished

design for kimiki puzzle finished. Seems ok but can't post pictures yet, it is a surprise for someone 😊 

Posted on May 6, 2015 .

New design

I decided to have a go at designing a new kimiki puzzle and it seems to have worked out ok. Having it 3D printed to start but hope to have it made in wood soon. Playing with ideas for different woods to match in with designs, so black and white woods for a penguin, maybe some lacewood for a fish, and of course zebrano. Will post some pics when I have a puzzle finisbed

Posted on April 14, 2015 .